Losing grip – Center of gravity and being clever about upgrades
Do you know where your car’s center of gravity is? I do, and you can find out in less than five minutes. It might save you money, and it might inform you to make better upgrade decisions.
I’ll start by explaining center of gravity, will then touch on torque, do a quick brief on tipping point and base of support, and then run it all in reverse at high speed and explain where to spend your money.
First, a note to appease the physicists out there. I know that center of gravity and center of mass are not the same thing, but since we’re not in the field of rocket science here, it doesn’t really matter. In the context of RC cars, the terms can be used interchangeably and since center of gravity, CoG for short, is the term generally used in the RC community that’s what I’ll stick to here. CoG is a simple concept and I think most of you have a pretty good idea of what it is. But as my physics teacher used to say: “So you think this is easy? Just wait until I’ve explained it”.
Now onto understanding CoG, and how knowing where it lies may inform the upgrade decisions of your car. The CoG is the point where we can consider the weight of an object to be centered. Suppose you have an apple (if an apple was good enough for Newton, it’s good enough for us). Now take your kitchen knife and cut it into slices, half an inch thick. Eat all slices but one, and while eating, go find yourself a tooth pick. Push it straight through the slice an inch or so below the middle, as if it was a target board pierced by an arrow shot by a mediocre archer.
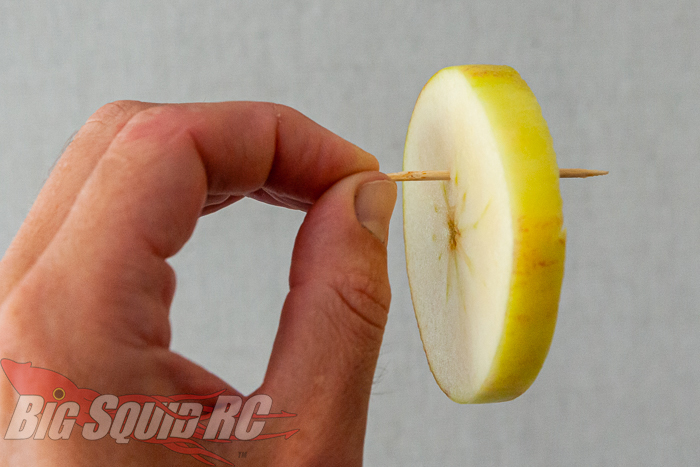
The Apple iCoG demonstration device. Order yours by email: martin at bigsquidrc.com, $300, apple not included. All profits will benefit this blog.
If we make another apple-slice-and-tooth-pick-assembly, and manage to push the tooth pick straight through its center of gravity the apple will not spin. Ever. But if we use our hands to set it into rotating around the tooth pick, it will spin forever. Assuming zero friction and that the assembly doesn’t rot.
When discussing cars, of any size, torque is often mentioned. Torque is the tendency of a force to turn or twist, causing rotational motion. If you take a yard stick and try balance it on your out stretched finger, unless its center of gravity rests on said finger, it will start to rotate and fall to the floor. The forces of gravity acting on it produce torque. If an object is able to pivot only around its center of gravity the forces of gravity will not produce any torque, the object will not rotate.
The CoG is interesting, because the stability of an object – say, for example, your RC car – is dependent on it. When the CoG passes outside the cars base of support, which is its wheels, it has passed the cars tipping point and the car will fall over. Wikipedia summarises tipping point like this: “a threshold in a sharp hysteresis loop; once reached, the system rapidly changes its state.” Easy. Imagine this: you’re out crawling an exciting mountain side with your favourite crawler, the sky is blue, your stomach is full. It’s a perfect day. Until you make a mistake, the car’s center of gravity passes its tipping point, it rolls over and then bounces and falls a mile down the mountain side. In an instant the system – you and the crawler – rapidly changed from serene and shining respectively, to crying and crushed.
An objects base of support is the area between its point of contact with the supporting surface, usually the ground. Your base of support when standing, is your feet and the area between them. Your cars base of support is the area between its wheels.
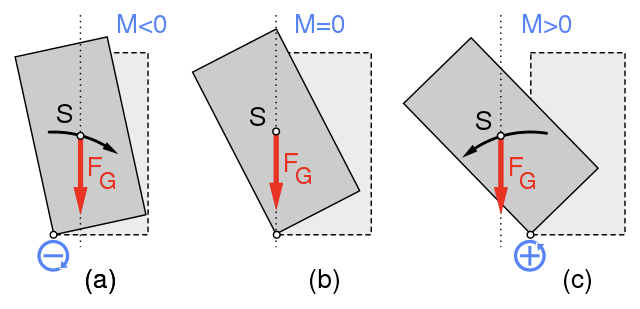
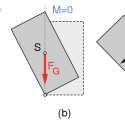
Schematically, it looks like this, picture courtesy of Wikimedia commons:
The small dot in the center of the grey object is the center of gravity, the red arrow is the forces of gravity, the black arrow is the torque produced by gravity. In (a), the forces of gravity passes through the base of support, and the torque returns the object to his previous position. In (b) the line of action runs through the pivot point at the edge of the base of support. In this case the resulting torque is zero and the object is in unstable equilibrium – balancing around its tipping point. In (c) the line of action is outside the base of support, and the object will fall over to the left. Had the base of support been wider, or the CoG closer towards the base of the object, then the object could have been tipped further without falling over.
Buying decisions then, what about those? This is where we run the whole thing in reverse. We know our cars support base, right? It’s the area between its wheels. We can then find out its tipping point, by simply tipping it until it just starts to fall over. If we know the support base, and the tipping point, we can then find out roughly where the center of gravity is, by drawing a line vertically up from the edge of the base of support. We’re doing this in only one plane, nota bene, right and left, up and down. Not forward and rear, since that’s not really interesting for our purpose. If we know where the center of gravity is, we then know where to add mass, and where not to, in order to improve it (i.e. moving it downwards).
Like this:
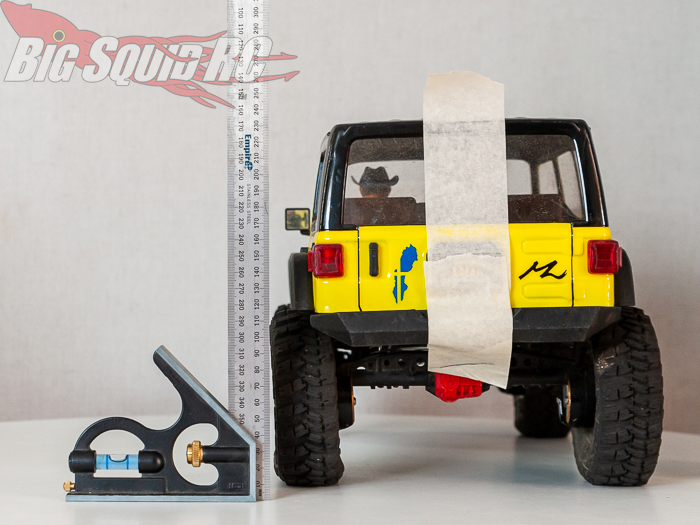
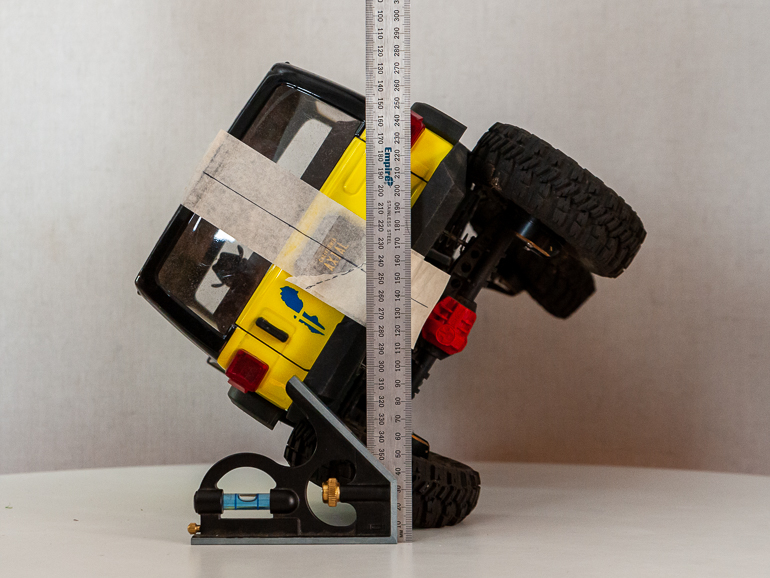
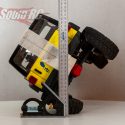
Equipment needed: a carpenter’s square, masking tape and a pen. Now put the square at the outer edge of the car’s support base, then gently tip the car until you find it’s tipping point. Since the wheels will fold under the weight, adjust the position of the square accordingly.
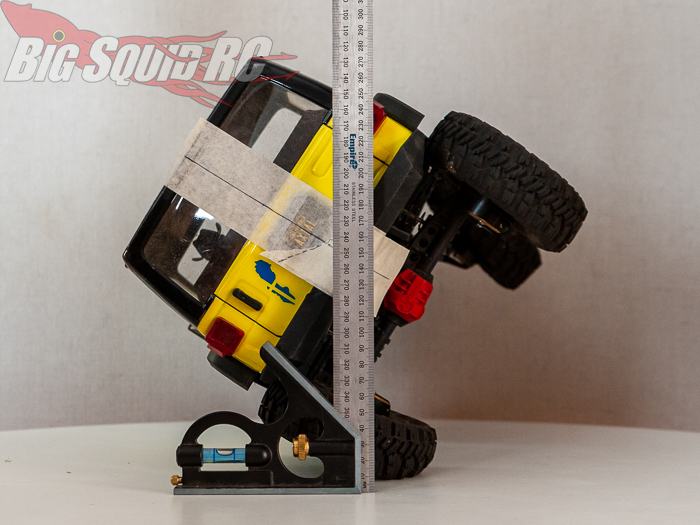
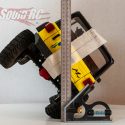
Now draw a line on the masking tape, along the carpenter’s square. Repeat the process tilting the car in the other direction.
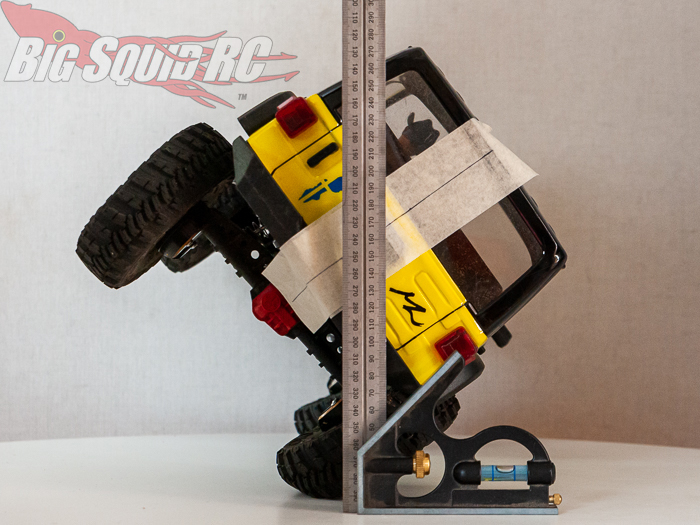
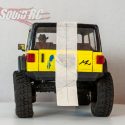
You will now have two lines on your tape. I also did a center line, but that’s not necessary. It should look something like this (never mind that poor Viper’s wheels are all wobbly after this little exercise):
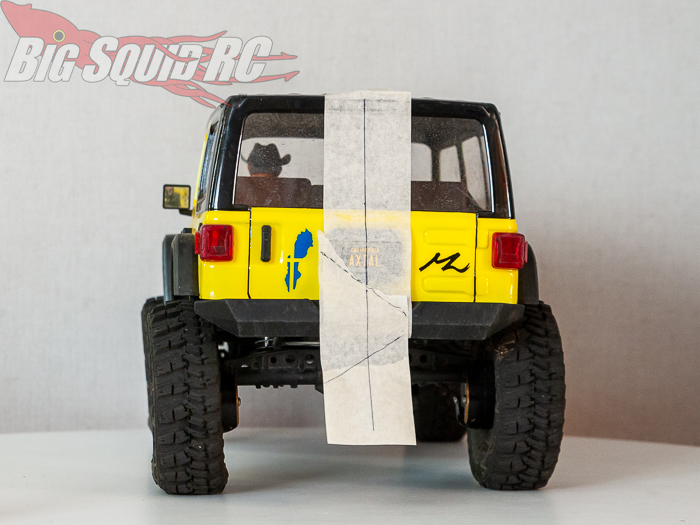
Where the lines cross, that’s where the car’s center of gravity is. In the case of my SCX10III, level with the rear bumper, about an inch to the right of the center line. I tried numerous times, and it was obvious that weight isn’t evenly distributed between right and left side.
Finally, the buying decisions I promised initially. Well, have you ever heard that steel bumpers are good, because they add weight down low? I have, numerous times. It might be true for some cars, but not for the car pictured above. I have added a lot of weight right around the axles using a hefty amount of brass from SamixRC, read about it here. All that brass moved the CoG to the point where adding steel bumpers will only add weight, but not move the CoG anywhere. Since I hade some problems with the motor running to hot this summer, that kind of weight is certainly not what I need.
I have mentioned that I am currently building a TRX-4. I will eventually add Samix brass portals and such to it, and imagine that this will move its CoG to roughly the same level as that of my SCX10III: level with the bumpers. I want to keep the TRX4 reasonably light. I also want to add lights and details to it. What to do? Steel bumpers are out of the question, since that will only be dead weight. Enter Club5Racing. I got in touch with them because the offer a staggering amount of parts, all 3D printed, and they sent me some things to try out. Lots of detail, but just about no added weight. Perfect! Using their Husky link 324 set, I have lengthened the wheel base of the TRX4 kit to Bronco 2021 length, while at the same time adding a bit of weight almost as far down as it gets. Front and rear bumpers look awesome, and weigh but a couple of grams more than the original parts. CoG will not move, weight does not increase. More on all of that in another column.
Now, I suggest that you go grab yourself a carpenter’s square, some masking tape and a pen. In less than ten minutes, you will know where your car’s center of gravity is, and where to add steel and brass, and where to opt for 3D-printed parts instead.
To read another column, hit the link!
PS. The Apple iCoG Demonstration Device pictured above can be ordered by emailing me at martin at bigsquidrc.com Cost $300, international shipping included. Apple and Zero Friction Spray not included, due to custom regulations. All profits will go to improving this blog.

