Monster Truck Madness – Finishing up the SCX10.3 Mud Truck
Hello everyone and Happy Thursday! It’s ya boy Doug here for another edition of MTM. Yes, I said last week would be the last regular of edition of MTM, but given I have irons still in the fire I figured I’ll keep it up through the end of August before discussing “what’s next”.
P.S.- to give any long time readers out there a potential leg-up, if you or someone you know is interested in writing for Big Squid, I know that the boss man is soon looking to expand the team! You’ll want to shoot a message (preferably with links/samples of your work) to Brian at BigSquidRC.com. Now, on to the project!
A few weeks ago I talked about how I had just picked up an Axial SCX10.3 Base Camp Builder’s Kit. I’ve spent a lot of time at the workbench since then, and it’s a pile-o-parts no more!
For a general parts/electronics list, you can check out my previous post.
The kit went together very easily. This is the first Axial kit I’ve built in many years- I think the last one was either an Axial Wraith or a generation 1 SCX10- and it felt very much like building a classic Axial kit. That’s a compliment! Really smooth. I did forgo using the standard black grease in the kit for some Cow RC Udder Butter. I applied liberally to all areas needing lube, and I packed the axles and transmission with the stuff.
I powered up the truck to make sure everything working as it should, and it felt silky smooth. The 3S battery combined with the JConcepts Silent Speed 21t motor gives it plenty of torque to move the big The Hold tires, and the servo feels plenty torquey. Time to work on the body.
To get the Corvair body to clear the big 1.9 tires without rubbing, I gave the fenders a slight hack. I have been dying to use a JConcepts Engine Accessory kit, and this was the perfect project to use a set of double carbs sticking out of the hood. Once I had everything mocked up correctly, I reamed the holes and it all fit fantastic.
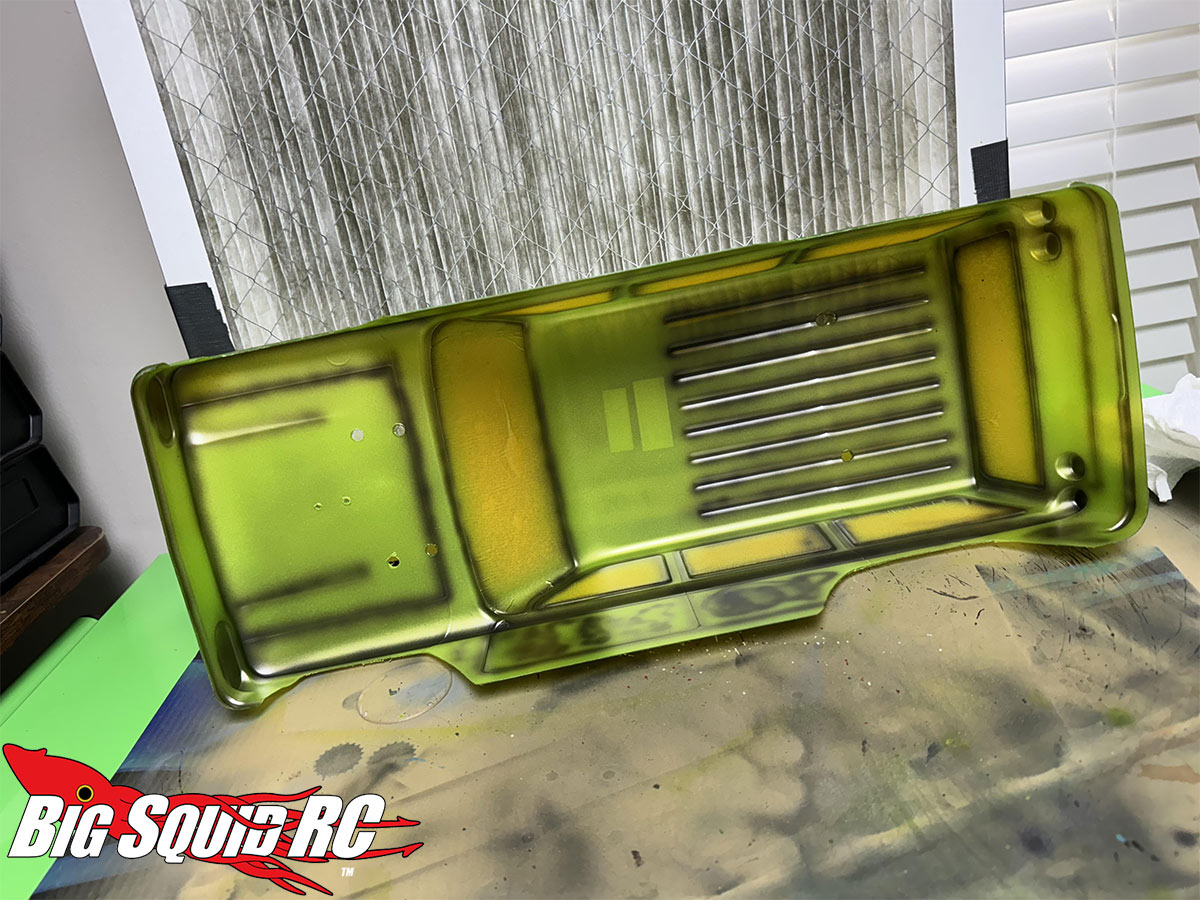
It was time to whip out the ‘ol airbrush and give the JConcepts Corvair body a working over. I created my usual Rotten Apple paint scheme- this time by putting down a base coat of Createx Wicked Green Apple, a secondary coat of Createx Pearl Lime, and I then hit the body panel accents to give the green a “rotting apple” look by way of some Pro-Line Metallic Charcoal. P.S. – I LOVE shooting Pro-Line’s pre thinned airbrush paint. That stuff goes on great every time!
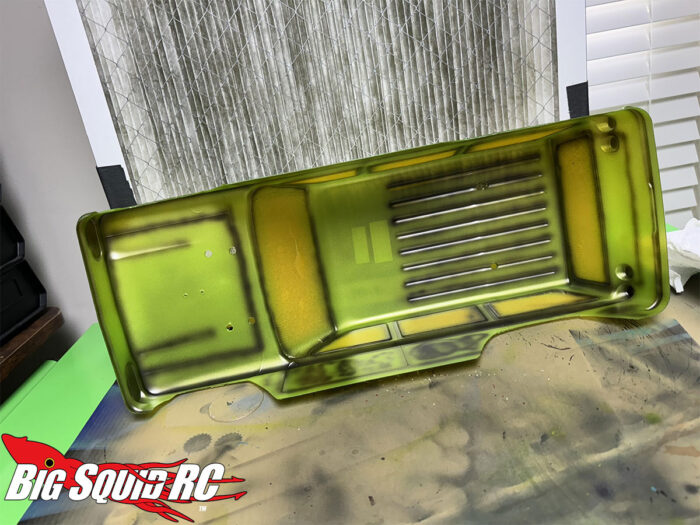
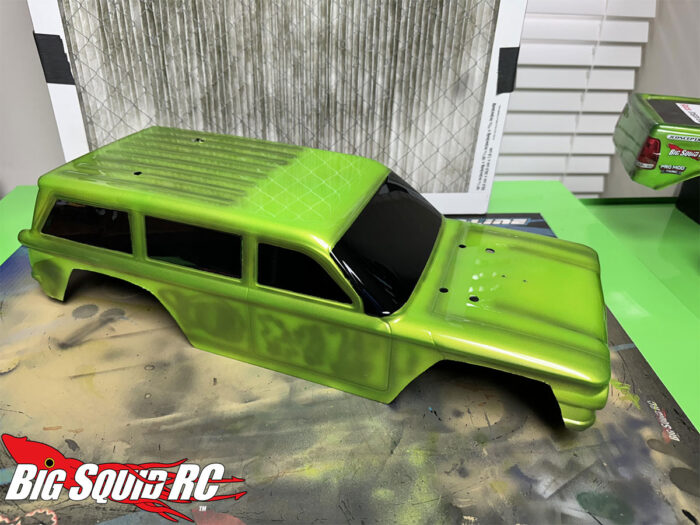
I then hit it with a backing coat of white Duratrax Bright White paint to pop it, and finished it off with a final coat of Duratrax Basic Black.
The last couple steps before calling it done was to install a front bumper and a roof rack. I went with an Injora RC Front Metal bumper to go with an aggressive stinger look. For the roof rack, I ganked an old Pro-Line one that I’ve had lying around for a decade or so (hey, it’s good to be a packrat sometimes!).
Here’s the Rotten Apple Corvair.


I’m calling the project done, though I did decide to order one last part for it. I went back and forth on rock sliders, but ultimately decided to order a set of stock Axial ones that come on the RTR Gladiator. I’m hoping those should fit. Once I get the sliders on, I’ll dremel the fenders to smooth them out some.
Those last couple things needed aside, man, I friggin’ love it. It turned out awesome and from my brief shakedown runs around the house, and it handles fantastic. I can’t wait to get it out on the trail and get muddy! Those aggressive lugs are just dying to throw some roost!
Alright, that’ll do it for me this week. Until next time, keep it on all 4’s!